Long-stay Visa Guidance for Paris Fall Semester Students
Step-by-Step Guidance on Obtaining Your Long-Stay Student Visa
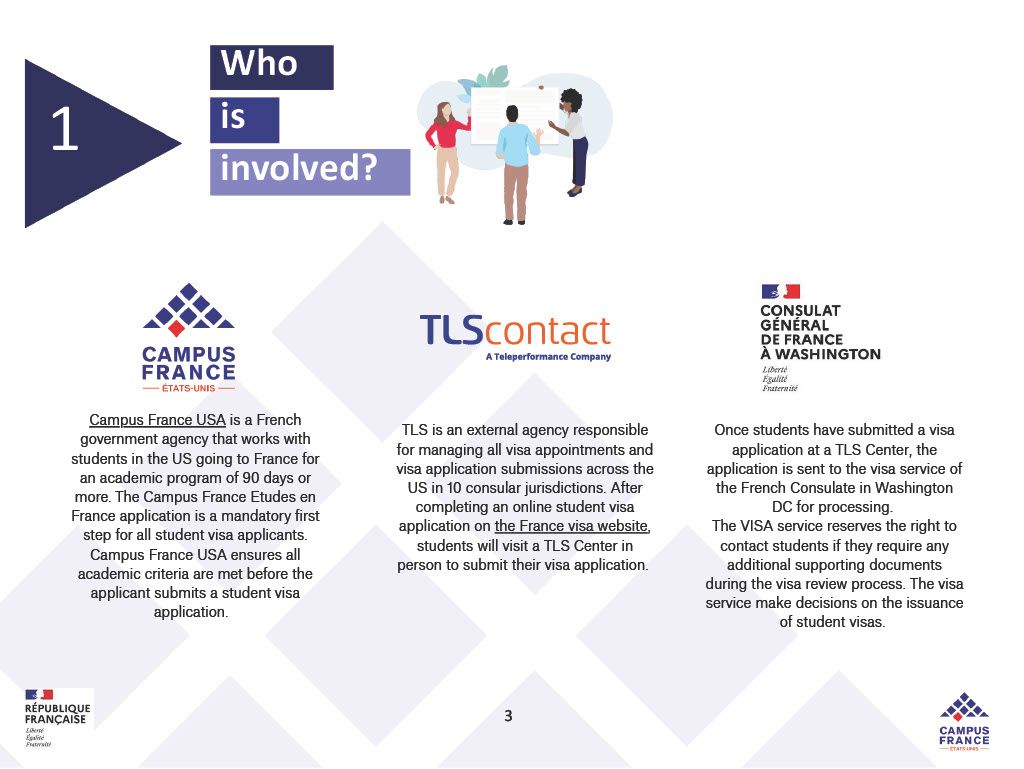
Your student visa application moves through three main players: Campus France USA, TLScontact, and the Consulate of France in Washington, DC.
Long-Stay Student Visa for France (VLS-TS)
If your program in France is longer than 90 days, you will need a long-stay student visa, also known as a VLS-TS (“visa de long séjour valant titre de séjour”). The VLS-TS is typically valid from about 4 months up to 1 year, depending on the dates of your program.
- Important timing note - in the United States, you generally cannot submit a long-stay visa application more than 3 months before your departure date. Because appointments can fill quickly, you should still start preparing earlier so you are ready to submit as soon as you are eligible.
Who is involved
-
Campus France USA (Études en France)
Campus France USA runs the Études en France “pre-consular” process for students in the US applying for a French student visa for stays over 90 days.
-
France-Visas (French government portal)
France-Visas is the official platform where you complete your visa application form and receive your personalized document checklist.
-
TLScontact (visa application center)
TLScontact manages visa appointment scheduling and document submission for France visa applications in the US. After you complete your France-Visas application, you submit your file and biometrics at a TLS center.
-
Consulate of France in Washington, DC (visa decision)
After submission, your application is processed by the French consular authorities (the decision is not made by TLScontact).
Step-by-Step Process
Step 1: Complete Études en France (Campus France USA)
Create your Études en France account and complete your application. Here are some helpful links!
• Études en France login: https://pastel.diplomatie.gouv.fr/etudesenfrance/dyn/public/authentification/login.html
• Application overview: https://www.usa.campusfrance.org/application-overview
•Études en France Application Guide: https://www.usa.campusfrance.org/etudes-en-france-guideline
• Video Tutorial (creating an account on Études en France and basics on completing the application): https://www.youtube.com/watch?v=cPOFA3dmn8g
• Video tutorial for completing an Etudes en France Application specifically for your category and student type - Study Abroad, Exchange, and Dual Degree Students: https://www.youtube.com/watch?v=Vn5d6SK6s3g
The links above provide general instructions for completing the Études en France application. Below, we outline specific guidance for students participating in the Fall Semester Program to help you select the correct application category and complete each step of the Études en France application. Visa application office hours will be available for students who would like additional assistance.
Guidance Specifically for Rice Global Paris Fall Semester Students on Études en France Application
Études en France (EEF) is the required pre-consular step for U.S.-based students planning to study in France for 90+ days before you can apply for your long-stay student visa. Campus France USA reviews your EEF submission and confirms your program details before you move on to France-Visas and your TLS appointment. Please use the links above in combinations with the guidance below (specifically for Paris Fall Semester sudents) to complete your application.
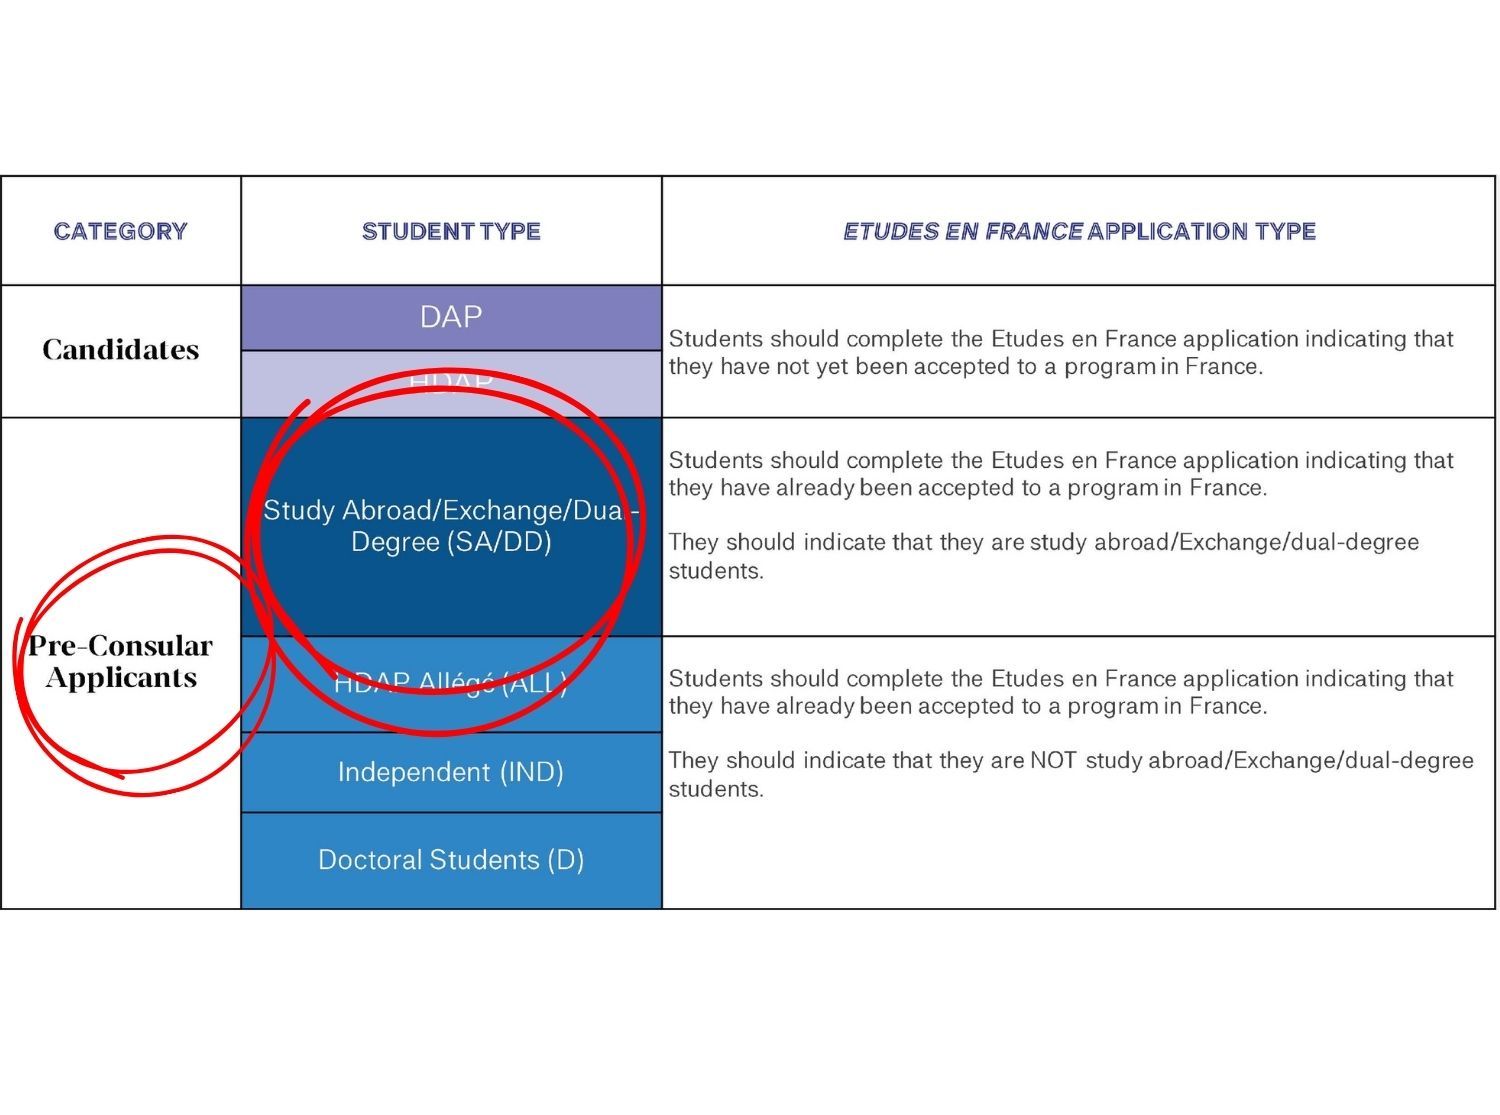
1. Confirm your category and student type
For the Rice Global Paris Fall Semester, you are completing an EEF pre-consular application as a Study Abroad/Exchange/Dual Degree student (pre-consular). This is not a degree-seeking (DAP or HDAP) application.
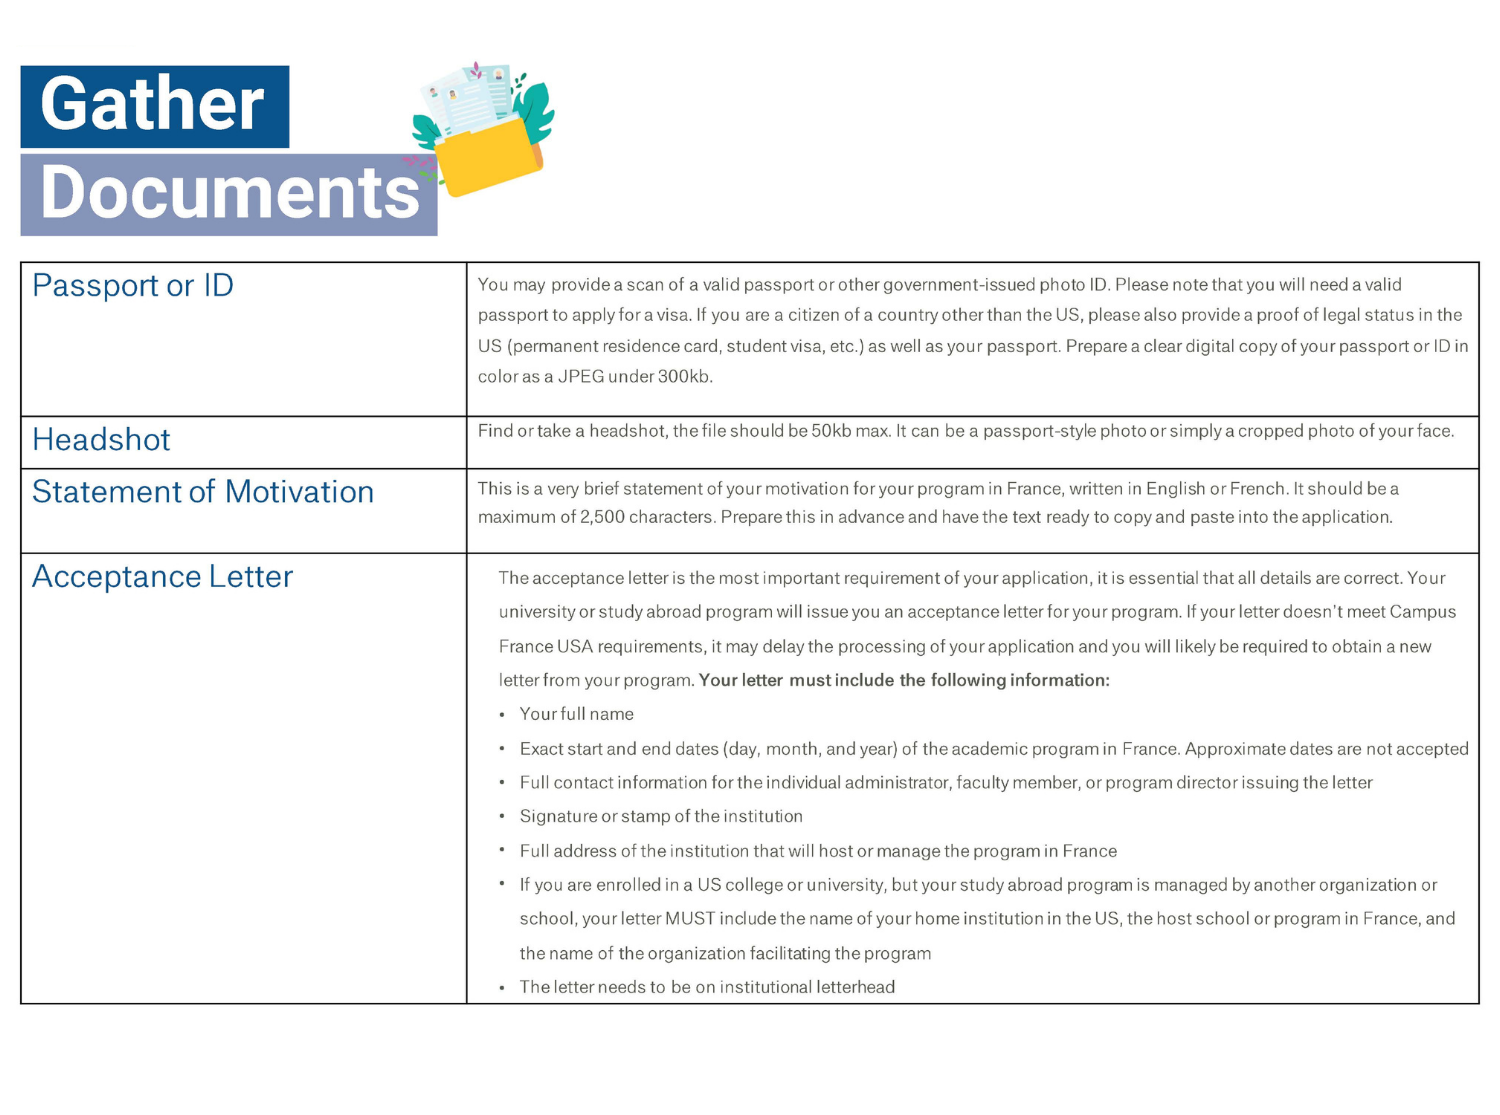
2. Gather your required documents first (so you don’t get stuck mid-application)
For Study Abroad/Dual Degree pre-consular applicants, you should prepare these items before you start — passport scan (JPG under 300kb), headshot (JPG under 50kb), statement of motivation (2,500 characters max), and official acceptance letter for the Rice Global Paris Fall Semester Program.
Tip: All uploads should be JPG files (not PDFs).
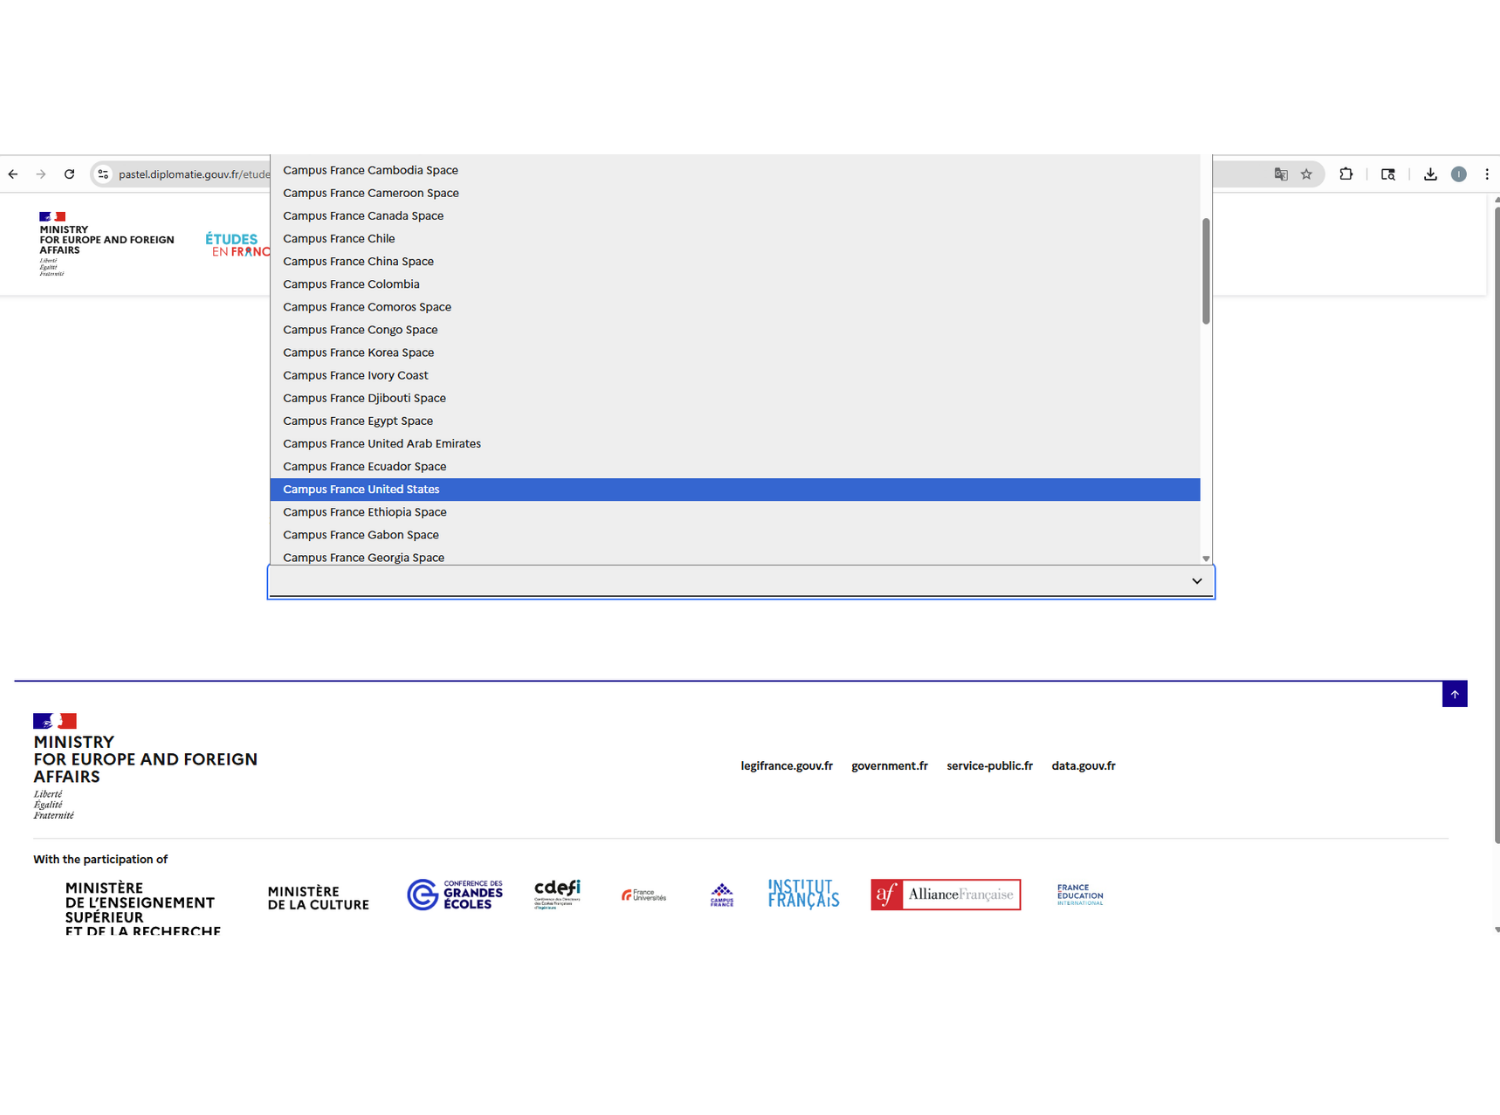
3. Select the correct Campus France office (United States)
When creating your Études en France account, you will be asked to choose your Campus France office. Select Campus France United States. It may appear alphabetically under E (for États-Unis, the French name for the United States), which can be easy to miss.
4. Create your Études en France account (use a personal email)
Create an account video linked above. Complete this step on a laptop or desktop (not a phone). If you run into glitches, try using Firefox. When creating your Études en France (EEF) account, use a personal email address (Gmail or Outlook), not your Rice email. School accounts may be deactivated after graduation, and you don’t want to miss important visa updates.
Use an email you will keep long-term, since visa updates may continue after the semester ends.

5. "Select the Program" section
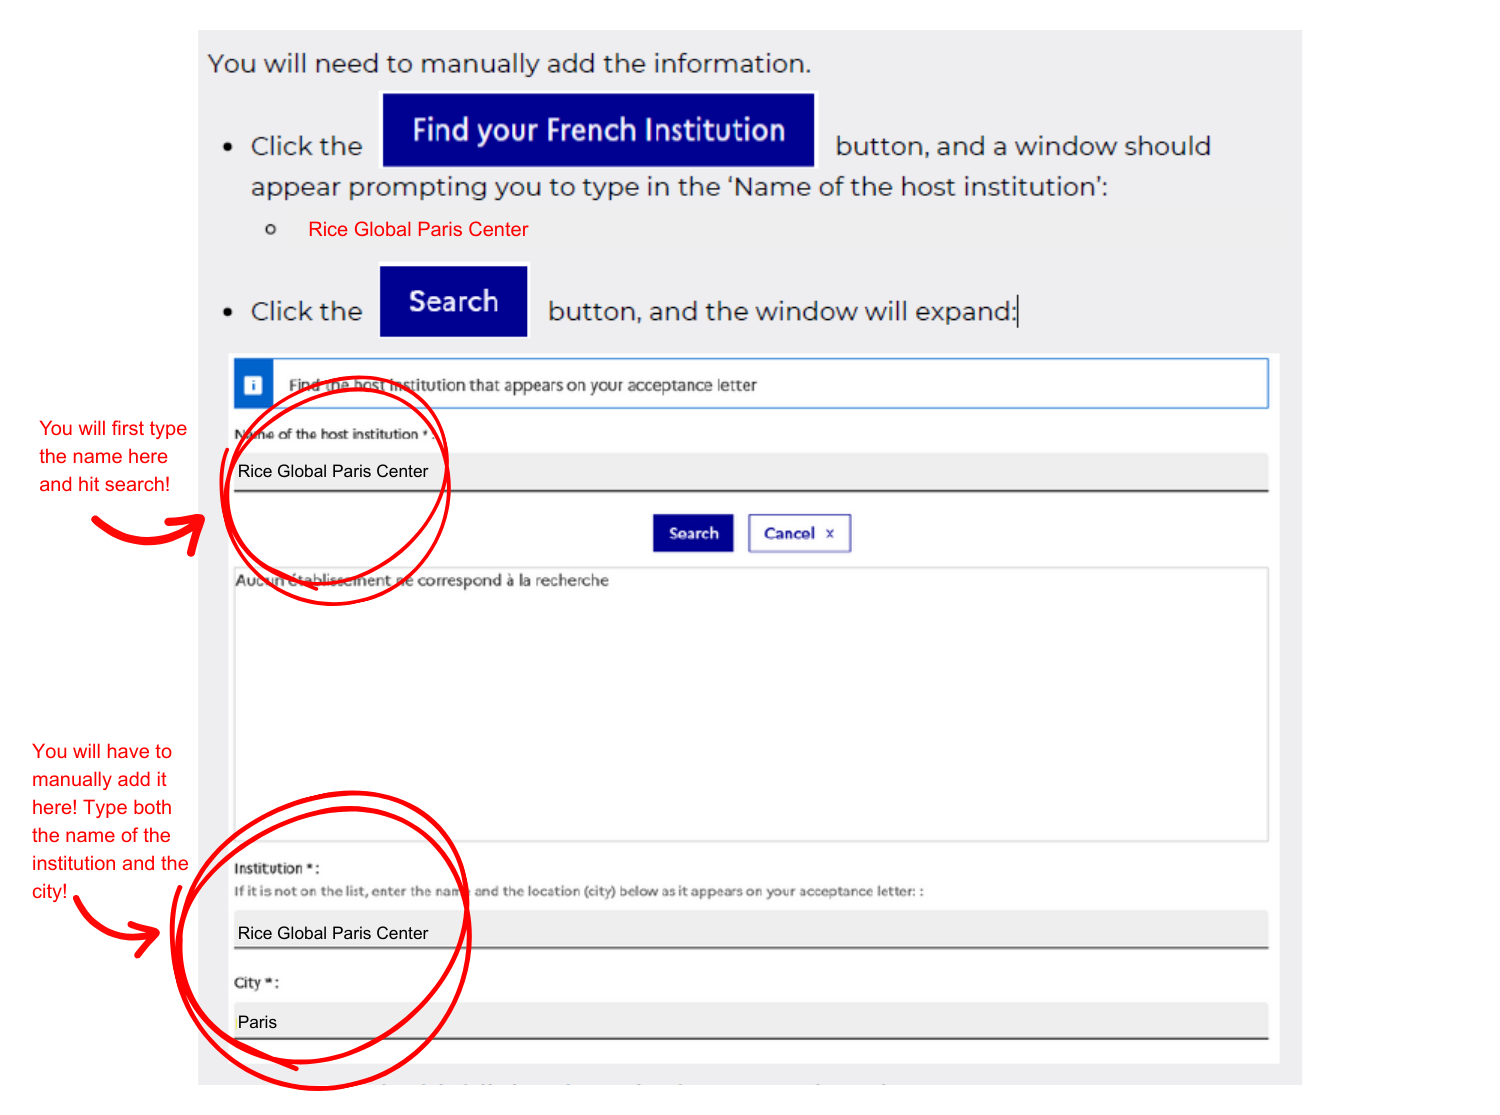
You select your program under the "Je suis accepté" (I am accepted) or "Students Already Accepted" tab. Click on "Add" or "Finalize the procedure" and look for the "Main Study Program" section. Enter your host institution (Rice Global Paris Center). Rice Global Paris Center may not appear automatically in the host institution dropdown, so you will need to add it manually. See steps on how to do this ➡️
Tip: Be sure to click “Register” to save the institution before moving on.
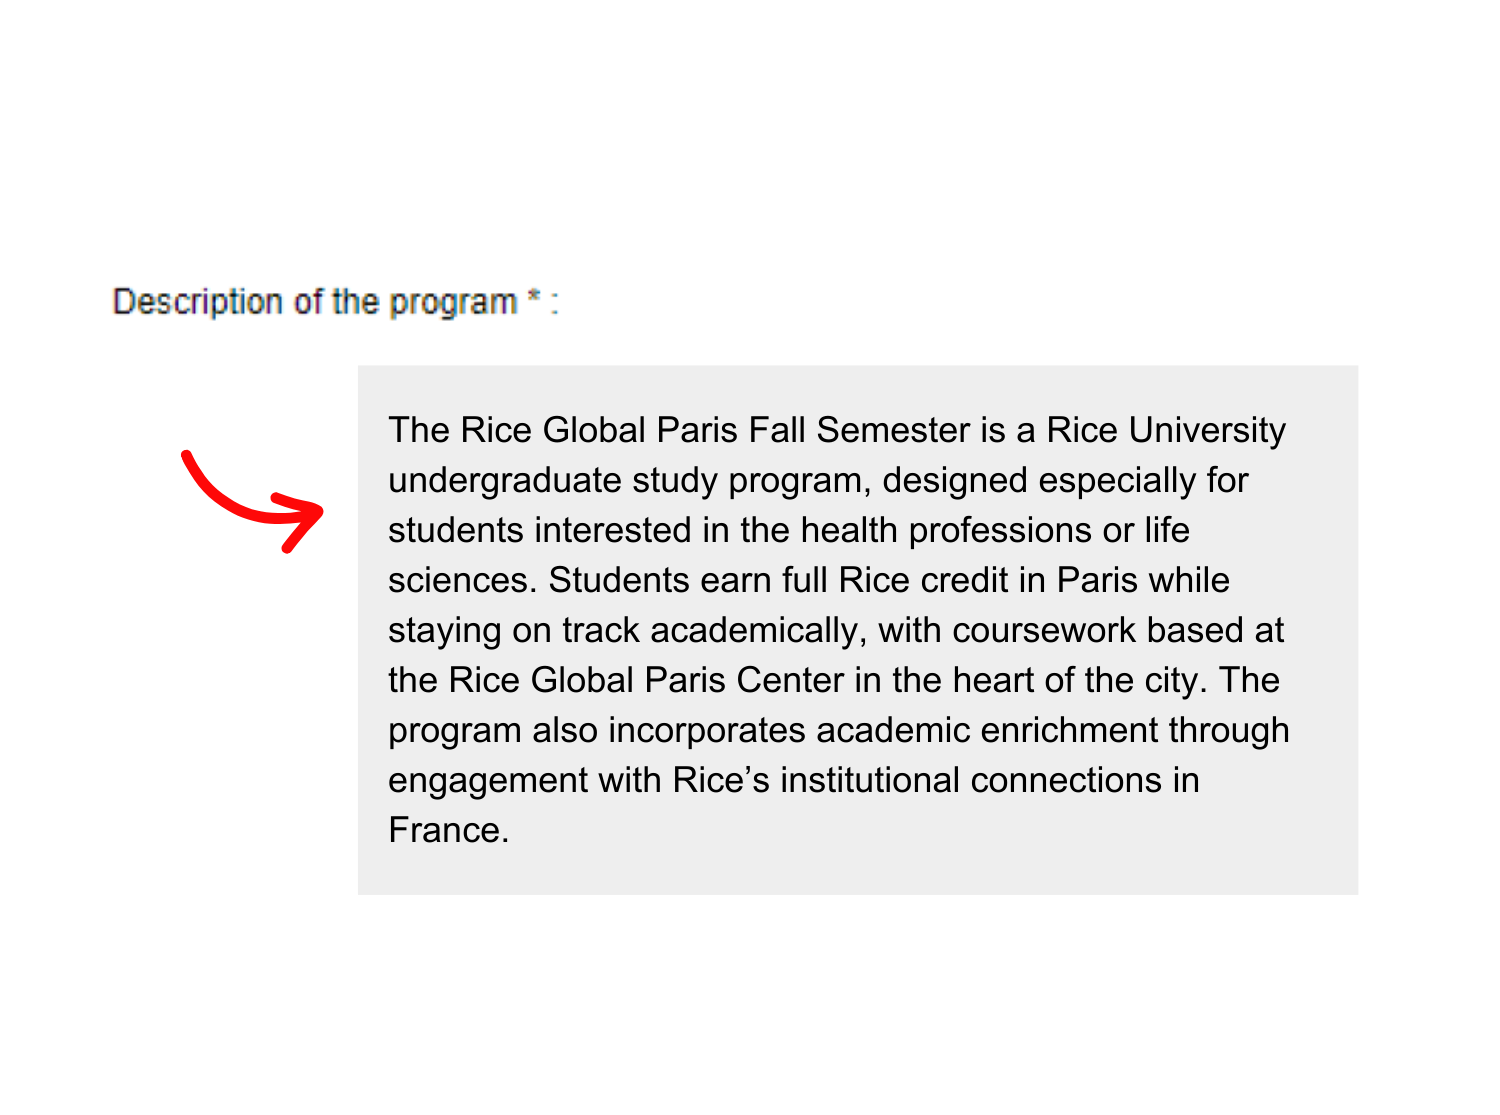
6. Add your program description (Rice Global Paris Fall Semester)
Next, EEF will ask for a short description of your program — copy & paste:
The Rice Global Paris Fall Semester is a Rice University undergraduate study program, designed especially for students interested in the health professions or life sciences. Students earn full Rice credit in Paris while staying on track academically, with coursework based at the Rice Global Paris Center in the heart of the city. The program also incorporates academic enrichment through engagement with Rice’s institutional connections in France.
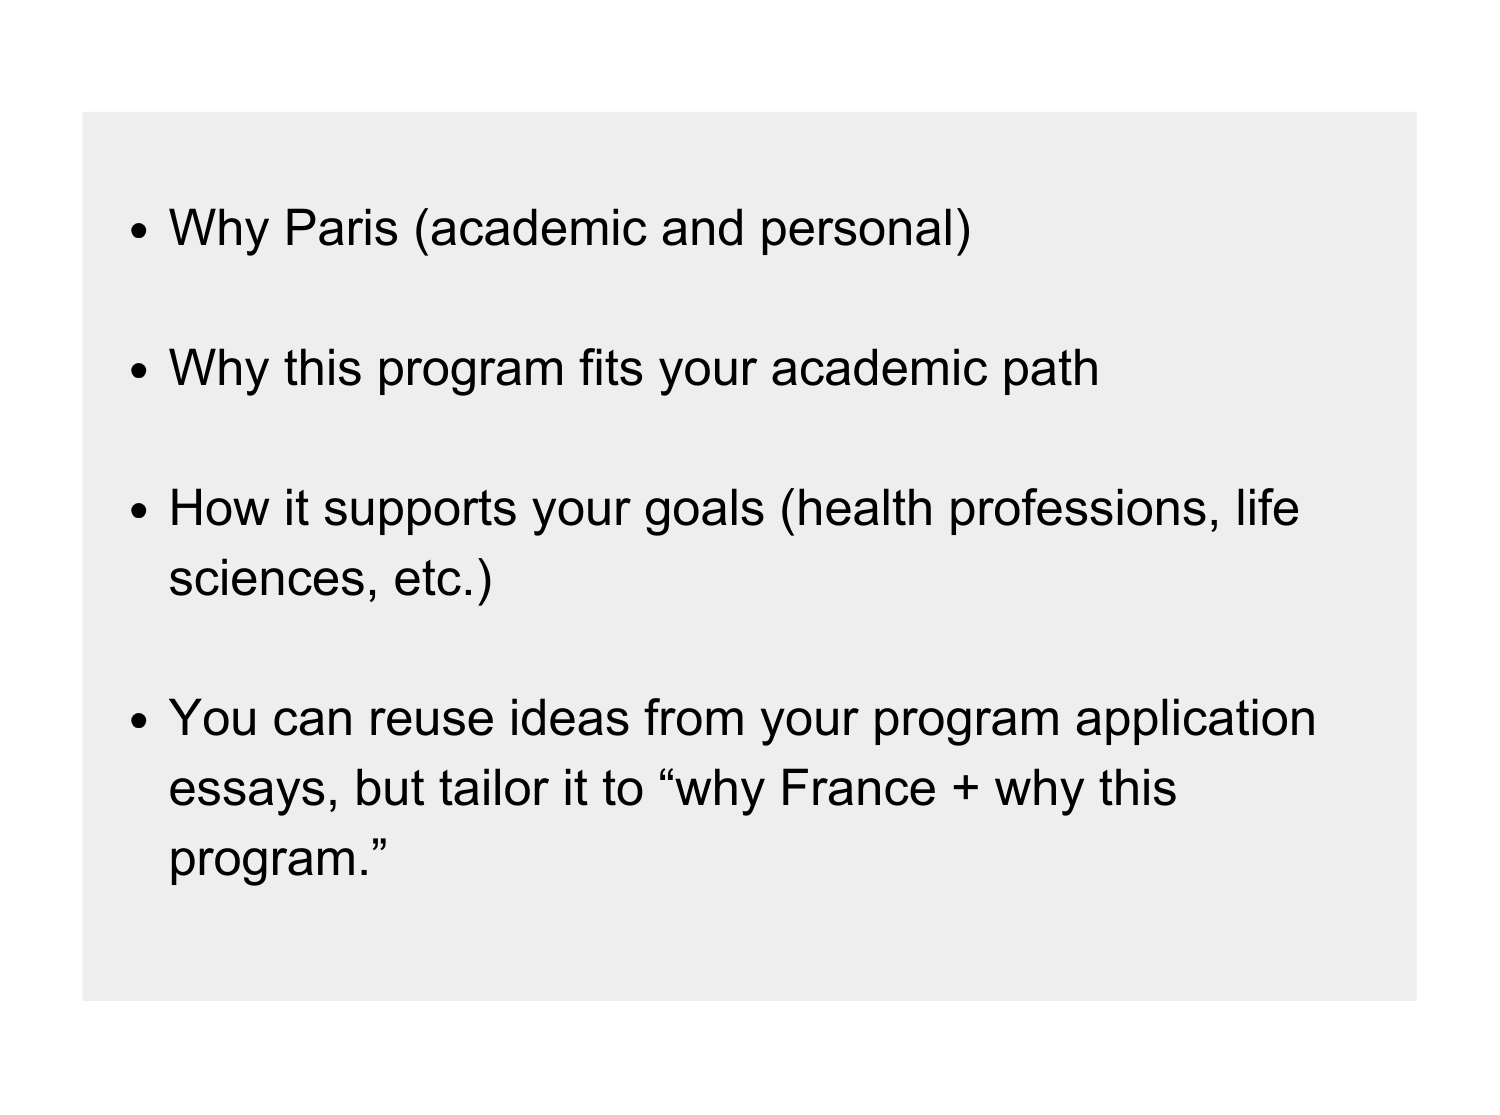
7. Write your statement of motivation (keep it simple and specific)
Your statement of motivation is short (2,500 characters max). Focus on ➡️
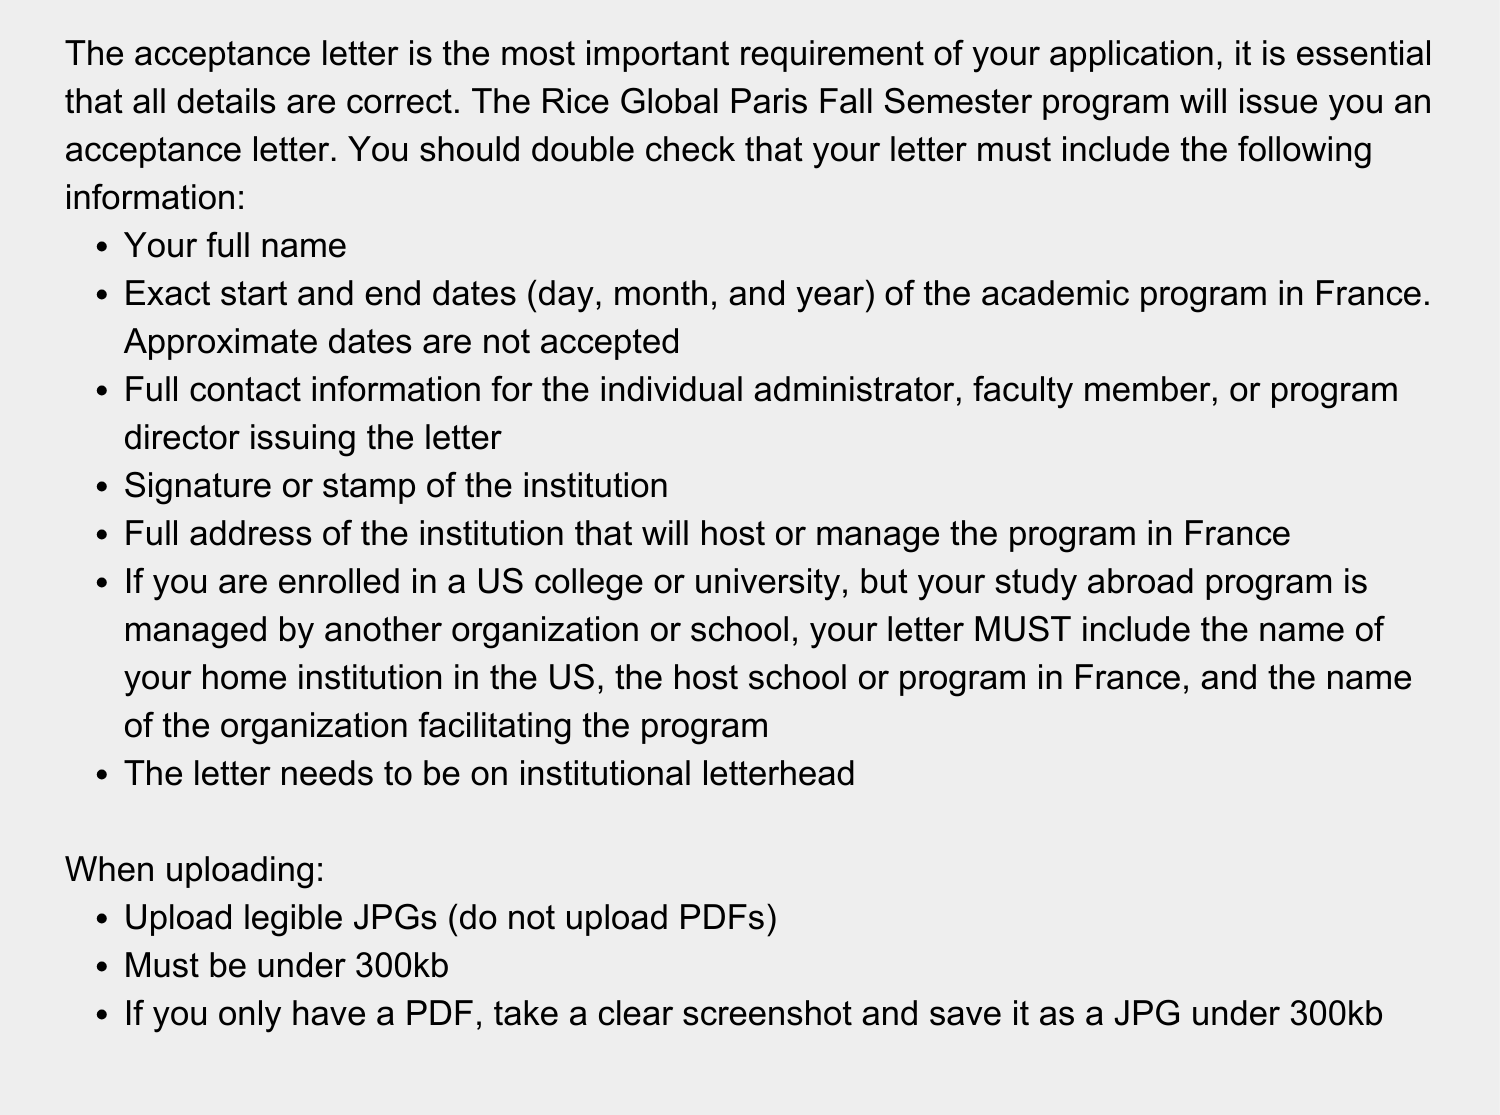
8. Upload official acceptance letter correctly (this is where most students get stuck)
Make sure your files meet EEF upload rules
Tip: Sometimes after uploading your files, it won't show up as uploaded. Try hitting refresh.
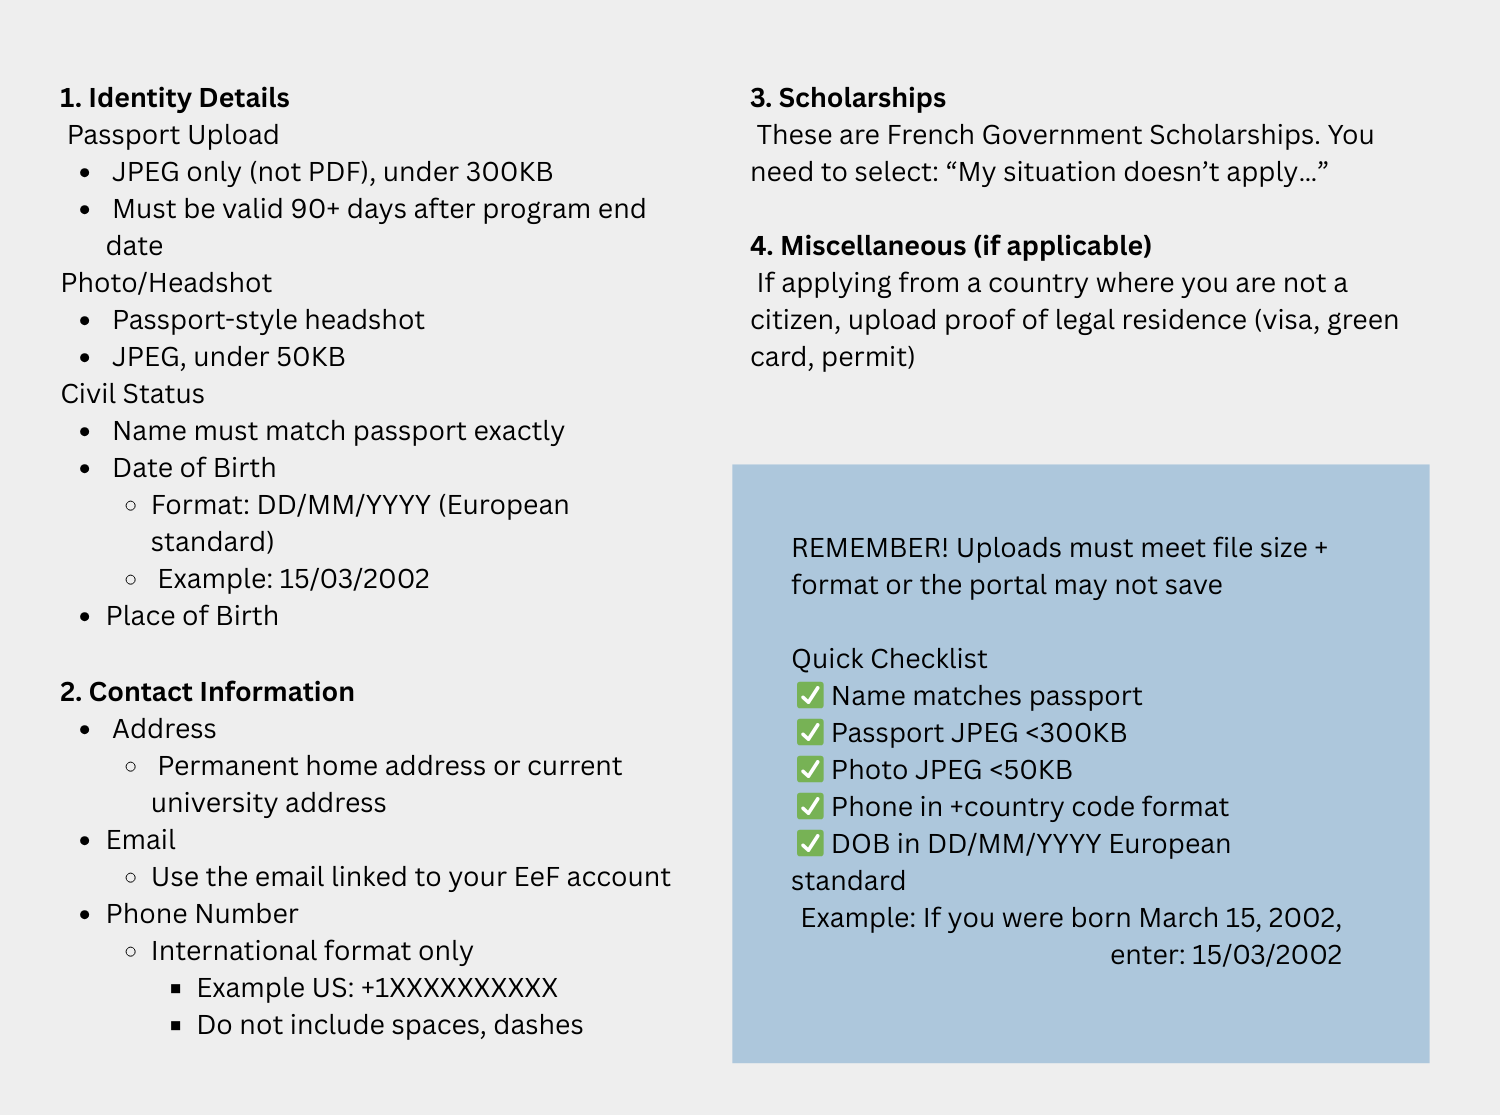
9. Fill out the "Personal Information" Section
Includes your identity details, contact information, and a scan of your passport.
Tip: Remember to click "Save" or "Register" when you complete this section
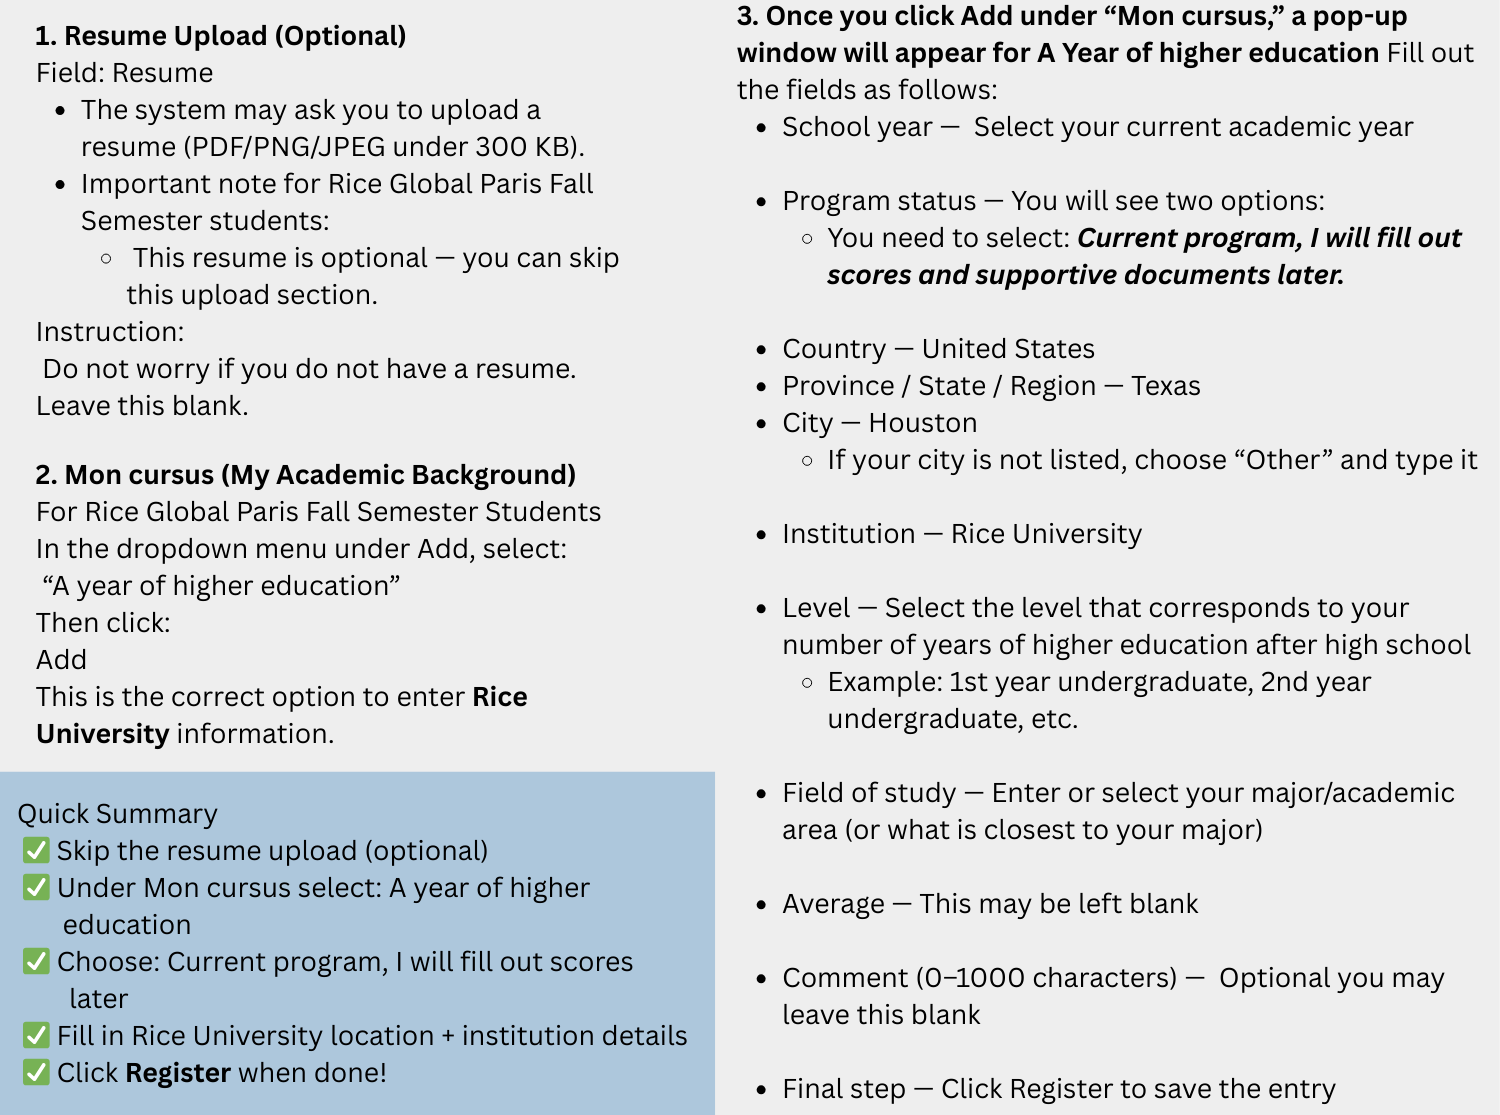
10. Fill out the "Educational and Professional Experience" section
In the Education and Professional Experience section of the Etudes en France (EeF) portal, students must document their academic history.
Detailed instructions here ➡️
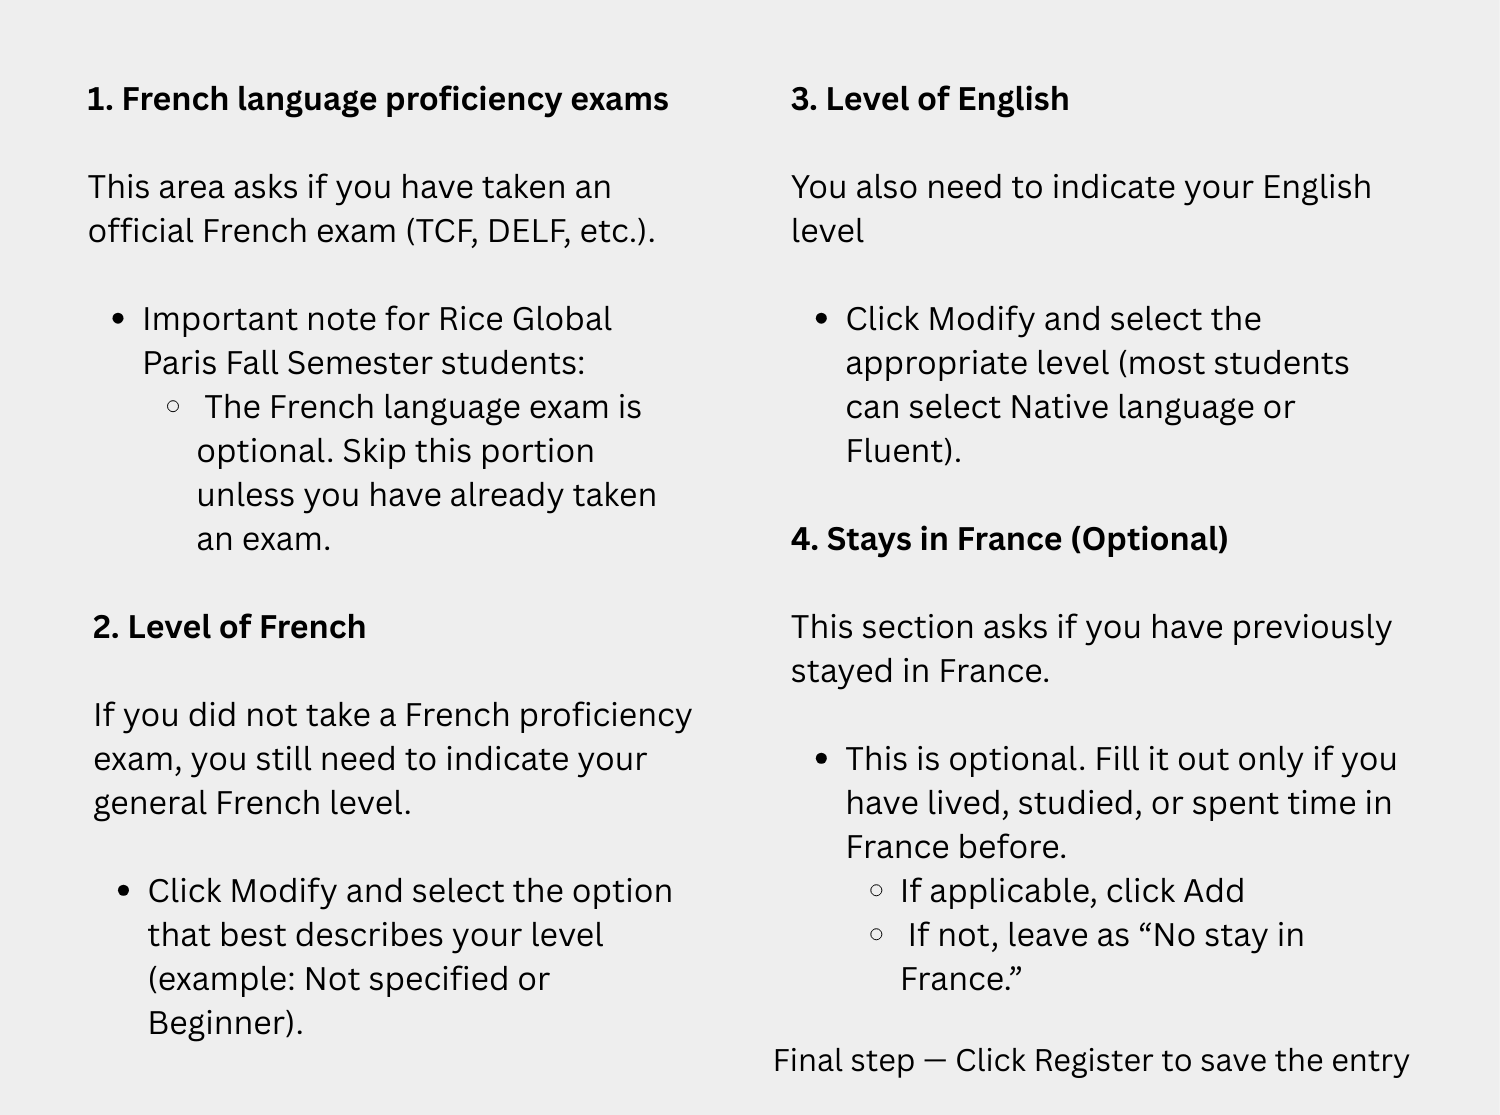
11. Fill out the "Language Skills" section
Involves documenting your proficiency in French (e.g., DELF/TCF scores) or English, depending on your program's requirements.
Detailed instructions here ➡️
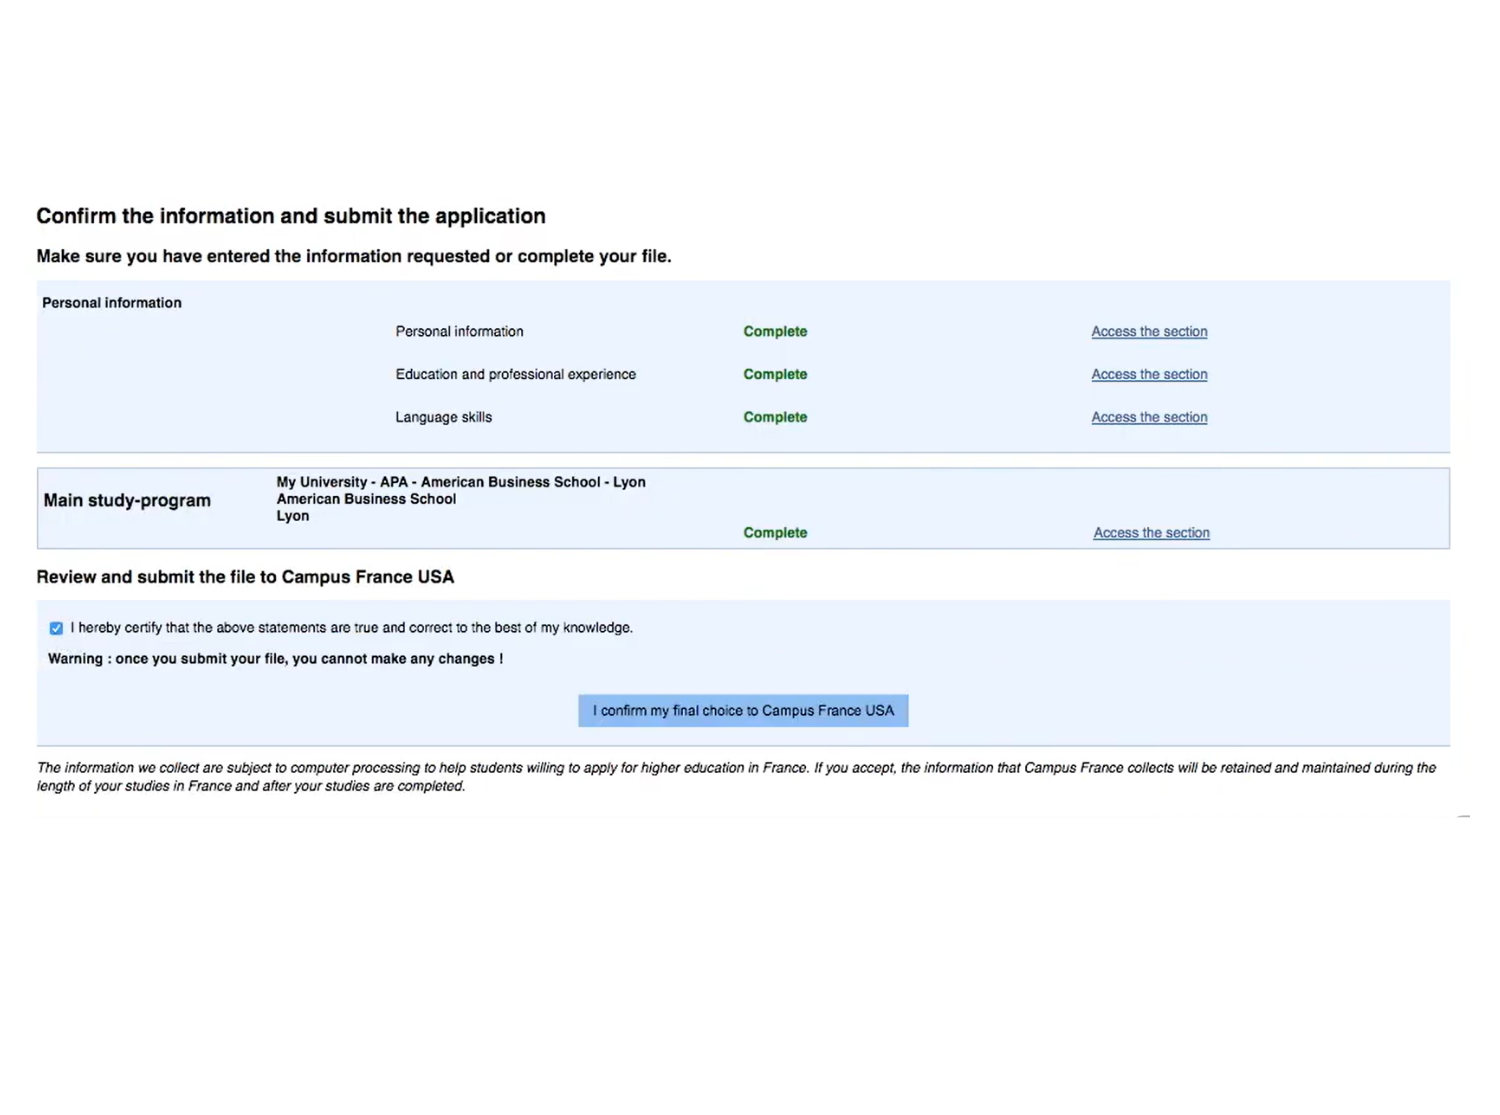
12. Submit your application
Scroll to the very bottom of the "Finalize the procedure" page. Look for a check box that says: "I hereby certify that the above statements are true and correct".
Once checked, the blue button "Submit the file to Campus France USA" will become clickable.
DON'T FORGET! Pay the Campus France fee
• After you submit your application, your application is not reviewed until you pay the Campus France Fee.
• For most study abroad or exchange-style applicants, the regular fee is $270.
• Some categories and expedited processing are higher (Campus France lists these by applicant type).
Tip: Use the same name and email consistently across Études en France, France-Visas, and TLScontact. Mismatches can cause delays. IT IS NOT RECOMMENDED TO USE YOUR RICE EMAIL!
Step 2: Wait for Campus France to process your file (and save your confirmation)
Once your Études en France application is processed, you will receive a confirmation email from Campus France USA. Print and save this email, as it may be requested at your visa appointment.
After you receive confirmation, log back into your Études en France account and download/save/print your official Campus France confirmation certificate (attestation). This document is required for your France-Visas and TLS visa appointment materials.
You may then move forward with your France-Visas application and schedule your in-person appointment with TLScontact.
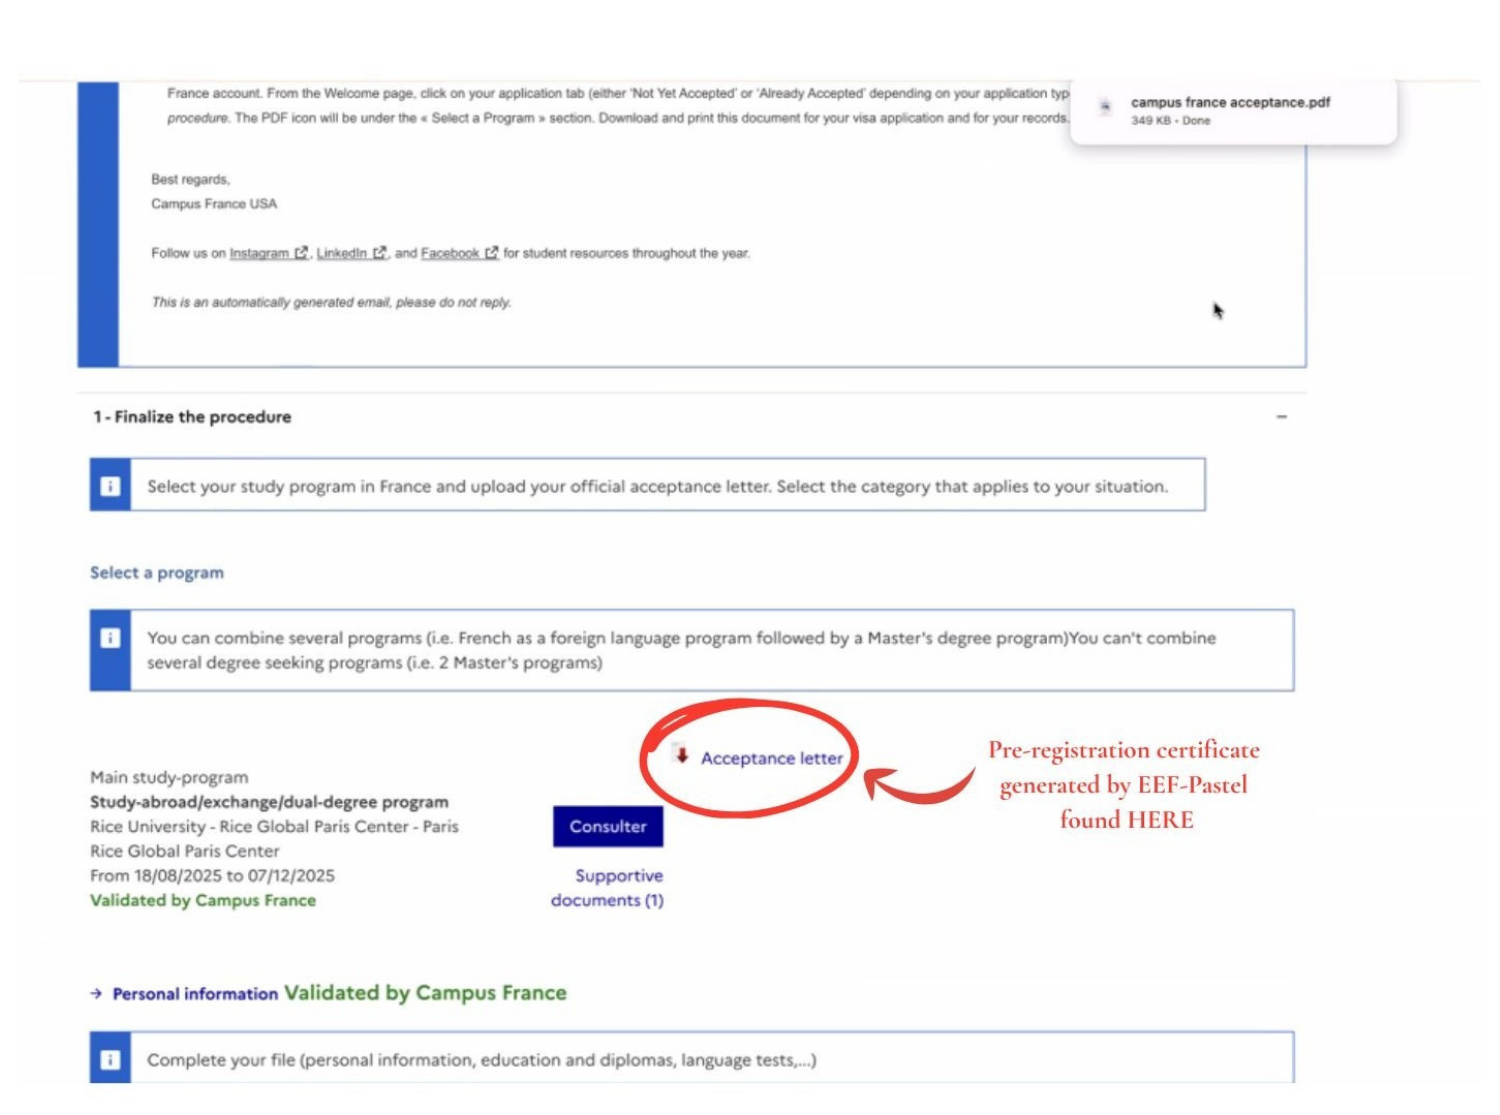
How to obtain the Pre-registration certificate generated by EEF-Pastel
To find this document, log-in to your Etudes en France account. From the Welcome page, click on your application tab (either “Not Yet Accepted” or “Already Accepted” depending on your application type), and click on 1-Finalize the procedure. The PDF icon will be under the “Select a Program” section.
Step 3: Complete the France-Visas online application
Go to France-Visas and complete the long-stay student visa application:
Helpful links:
-
Visa application guidelines page on France-Visas is a general overview of the full French visa application process, from start to finish. It’s meant for anyone applying for a French visa (short-stay or long-stay)
Remember! Rice Global Paris Fall Semester students are applying for a long-stay visa (VLS-TS).
-
Campus France USA’s Student Visa Guide provides an official step-by-step overview of the French long-stay student visa process for U.S. students. It includes a helpful document checklist, timeline, and key instructions for completing the required Campus France and visa application steps.
What should Rice Global Paris Fall Semester students do after reviewing these links?
- Use the Visa Wizard to confirm they need a “Student – Long Stay” visa
- Review the document checklist it generates and gather these documents!
- Then go to Start my visa application and create the France-Visas account while completing the form
- Save and print the application AND receipt
- If you have any questions about the application, set up an appointment with our office by emailing globalowls@rice.edu
Step 4: Schedule and attend your TLScontact appointment (in person)
1. Create a TLScontact account and book an appointment at your assigned TLS center
- TLS locations in the US: https://france-visas.gouv.fr/en/united-states-of-america
- Houston center page: https://visas-fr.tlscontact.com/country/us/vac/usHOU2fr
2. Bring your complete document set to the appointment. Be Overprepared: Use the Official Checklists First!
Your most important resources for visa preparation are (1) the Campus France USA Student Visa Guidelines and (2) the personalized document checklist generated by the France-Visas Visa Wizard. These official lists are the source of truth, and you should always bring any additional items that appear there, even if they are not mentioned elsewhere.
You must bring the documents listed on your France-Visas checklist, plus any items required by the Campus France student visa guide. Incomplete files are a common reason applications get delayed, so when in doubt, it is always better to be overprepared and bring extra supporting documentation.
Below is a helpful starting list of documents that most Rice Global Paris Fall Semester students should plan to have ready, but you should double-check your official France-Visas and Campus France requirements as your appointment approaches.
Helpful Documents to Have Prepared (Be Overprepared!)
Most students should expect to bring:
-
Valid passport (original + copies of all pages)
-
Printed France-Visas application form and receipt
-
Passport-style photographs (professional, visa-compliant)
-
Campus France confirmation email
-
Pre-registration certificate downloaded from Études en France (EEF)
-
Proof of sufficient financial resources (€615/month minimum).
The French government requires students to show access to at least €615 per month (about $665/month) for living expenses. Visa officers typically expect this to be supported with bank documentation, even if you are receiving financial aid. Plan to bring:
- The most recent 3 months of bank statements (student or parent/guardian)
- A financial aid or scholarship award letter, if applicable
- An affidavit of support if using a parent/guardian’s funds
Even if your financial aid letter shows sufficient funding, students are still commonly asked to provide recent bank statements as supporting documentation. When in doubt, bring more financial documentation rather than less.
-
Proof of accommodation (Rice Global housing letter)
-
Program acceptance/enrollment letter from Rice Global Paris
-
Proof of Rice enrollment (Registrar verification) -
Provide documentation confirming your enrollment. You can obtain this here: https://registrar.rice.edu/students/verifications - Follow steps for Electronic Enrollment Verifications - it’s free of charge and requires netid login
-
Visa fee payment method
-
You may be asked to show international student insurance (for non-EU nationals).Rice provides international travel insurance, through which you can subscribe and generate proof of insurance coverage. Make sure the date stated on this proof spans over the duration of your stay. Information about his can be found here https://global.rice.edu/travel-resources/crisis24
-
Any additional documents listed on your France-Visas or TLS checklist
Step 5: Validate your VLS-TS Online after arrival in France
After you receive your visa and arrive in France, you must validate your VLS-TS online.
If you receive a VLS-TS, you must validate it online within 3 months of arriving in France. Validation is required to keep your status legal in France and to re-enter the Schengen Area after travel.
Instructions on how to do that can be found here: https://www.campusfrance.org/en/how-to-validate-your-long-stay-visa-visa-long-sejour-upon-your-arrival-in-france
Fees and typical costs (students pay these directly)
Visa-related fees may change slightly each year. Students should always confirm the most current amounts on the official Campus France, France-Visas, and TLScontact websites before making payments.
1. Campus France (Études en France) fee for Study Abroad / Exchange (Pre-Consular) applicants in the United States must pay the Campus France processing fee:
- Regular processing: $270 (approximately 3 weeks)
- Expedited processing: $460 (approximately 3 business days)
Campus France will provide payment instructions directly through the Études en France portal.
2. French long-stay visa fee (paid for the visa itself)
- The standard government fee for a long-stay student visa (VLS-TS) is: €99
- This fee is set by the French government and is typically paid as part of the visa submission process.
3. TLScontact service fee (paid at your visa appointment)
- TLScontact charges a service fee for appointment management, document collection, and biometrics. In recent years, this fee has been approximately €220
- Students should confirm the exact TLS fee for their assigned visa center before their appointment, as it may vary slightly by location.
4. Visa validation fee after arrival in France (required)
- After arriving in France, students holding a VLS-TS student visa must complete an online visa validation within the first 3 months of arrival. This validation includes payment of a required French residence tax (OFII tax), typically €60
- Students will pay this online during the validation process.
Estimated total typical costs (approximate)
Most students should expect total required visa-related fees of approximately:
- Campus France: $270–$460
- Visa fee: €99
- TLS fee: ~€220
- Validation tax: ~€60
Important reminder
France-Visas warns students to avoid unofficial or scam websites offering visa appointments or paid services. Students should use only the official platforms:
- Campus France USA
- France-Visas
- TLScontact